BSoUP’s In Focus, spring 2004
Before I go any further, let me lay down my credentials. Experience in land  photography: a bit. Total experience in underwater photography: about three weeks. Lifetime photographic achievement: a picture of the cat playing in the garden and a pleasing shot of an ornate ghost pipe fish. Err… That’s about it, really.
I discovered underwater photography when Jane, my wife, purchased a Motor Marine II. Soon afterwards, she moved on to a housed SLR system and started to obtain some pretty amazing results. So I eventually became the proud owner of a brand-new Nikon D100 with a Sea & Sea housing. Forget the bank balance! A f ew days later, we were off to Wakatobi. No half measures!
Although I’d owned SLR cameras before, I tried to play with the D100 on dry land as much as I could, in order to get to know the thing. As I was using a digital camera, I didn’t have to worry about wasting f ilm. Other than the digital-specif ic features, the camera didn’t really feel much different from my old F601. The same photography modes were offered: Program, Aperture, Speed and Manual. Select a mode, select a speed / aperture combination, point lens towards subject and shoot. Easy! What differed from my old SLR was that I could then review the picture immediately, change my settings and shoot again.
Time to get the camera wet. I must have checked every 0 ring at least half a dozen times. The housing looked OK in the rinsing tank, so off we went. In Wakatobi, the choice of subjects was rather impressive so I had to concentrate hard on choosing my subject rather than take holiday snaps. I started with stationary models and a 60mm lens.
The first hurdle I faced was the exposure. After some conversations with experienced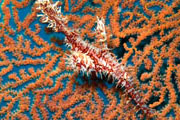 digital photographers, I had decided to shoot in Manual mode, rather than Aperture or Speed priority. I used a YS90DX strobe, designed for digital cameras. This combination of camera and strobe didn’t allow me to use TTL metering. Instead, with the YS90DX, I had to set the strobe’s power setting manually. My f irst pictures were appalling. At this point, I discovered another very useful feature: the Delete button! After the dive, why show people that you’re a complete moron when you can fake it by deleting the abysmal shots before you’ve even reached the surface? Very quickly, I developed a new technique. Take a picture, see what’s wrong with it, delete it, take another one and so on. After a while, I found a good combination of f lash and exposure.
Once I had a basic grasp of the technique, I set about improving my composition. I once heard Peter Scoones say at a BSoUP meeting: ‘It’s not the number of megapixels in your camera that counts. It’s what you have in the viewfinder and when you press 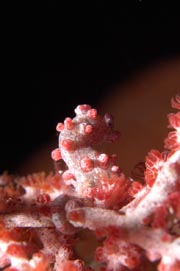 the shutter”. How right could he be – Wakatobi is known for its plethora of pygmy seahorses and I really wanted to get decent shots of them. ‘It ccn’t be that difficult I thought. “Attach the biggest lens available, add whatever magnifying device you can find, get close. Et voila! See you in Antibes.” I attached the 105mm lens to the camera body, screwed on a diopter, added e Nexus wet lens to the housing port and set off in my quest of mega-close-ups of the eye of a seahorse. With “a bit’ of help from the dive guide, I found a fan with 2 Hippocampus bargibanti. Perfect so far. However, finding the seahorse on the fan was one thing, but finding it though the viewfinder when the camera’s depth of field must be a couple of millimetres is quite another. My frustration grew. Dive time: 70 minutes. Time spent on the fan.. 40 minutes. Photos of the fan: a f ew. Photos of pygmy seahorses: nada. First lesson learnt the hard way: don’t try to run before you con walk.
During the next few dives, I used the 60mm lens and tried to choose easier subjects. Whip corals, bubble corals and anemones all offered some lovely static opportunities. Slow moving creatures such as nudibranchs, lion fish, and leaf fish were everywhere in Wakatobi. One bit of advice I was given was to avoid getting too close to mantis shrimps. With their expert kung-fu kicks, they can somewhat spoil your day and upset your insurance broker if they don’t like the look of your camera.
With time, I found myself actually taking fewer pictures instead of just pretending I’d only taken a few!
I did try my hand at wide-angle photography, using a 16mm fisheye lens. The results were  not fantastic, but I’m sure it was more down to the operator than the camera. This said, my pride wasn’t that dented because the D100 is not known to be a particularly good performer for wide-angle photography. This is due to the size of its CCD and the magnification issue. To tackle this problem, Nikon recently launched 2 lenses specially designed with digital cameras in mind: an AF DX Fisheye 10.5mm f/2.8 and an AF-S DX 1224mm f/4 G IF-ED zoom lens. That’s what I should have used to get those award-winning shots! I fully blame the equipment! One of my biggest concerns when taking up digital photography was the amount of storage required. In full resolution, the size of TIFF images from the D100 is about 18MB. The Nikon Raw (NEF) images are just over 9MB. I used exclusively Raw format when saving my pictures, as this would later allow me greater control when retouching the images. A 1Gb Microdrive card allowed me to save 109 pictures which, in most cases, was enough for a day’s diving. I then needed to transfer the images from the card to a bigger storage device. I knew that my luggage allowance would already be very stretched so taking a laptop with me was out of the question. My two best choices were a portable CD writer that could read memory cards, or a portable hard drive. The first option was the cheapest and safest as CD-ROMs are more difficult to crash than hard disks, but I would have to pack a stack of blank CDs in my luggage. The alternative I chose was a nifty little toy called Phototainer. This portable jukebox has a 20Gb hard drive with a built-in LCD screen and weighs next to nothing. It can read Microdrive cards and connects to a PC or Mac using a USB2 port. It can also doubleup as an MP3 player or backup computer hard drive.
After ten days on the remote Indonesian resort, I really felt that my underwater photography 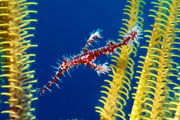 skills were improving, but I also knew it was only the beginning of a lengthy learning process. Each day, I was able to review my pictures on a television set. Experienced photographers would give me advice on how to correct some basic mistakes I had made. Had I owned a 35mm camera, I would have had to get my films developed every day at the resort to check my results. With 1,200 pictures taken, it would have been rather costly! Admittedly, digital SLR cameras are not cheap, but once you get over the shock of the initial expense, they don’t cost you a penny, other than the price of gadgets and gizmos you keep buying afterwards!
I flew home with mixed feelings about my results. As my first photography trip, I hadn’t expected miracles. It took me a few dives just to get a couple of shots of pygmy seahorses, and I still have to learn the secret of having them pose for me! Seeing other people’s successes made me very envious and I fully intended to persevere in order to obtain perfect images. That’s when I decided to cheat!
One nice feature of digital photography is the ability to retouch images. Some say it’s cheating, but everybody does it! The ethics debate has been going on for some time. My opinion is that I take pictures for my own viewing pleasure. If I can make an image more pleasant to look at, then why deny myself the tools to do so? Backscatter seldom adds anything to a picture, does it? Of course, it is possible to scan a 35mm slide and load it in Photoshop. Raw format files go a little bit further, allowing you to enhance sharpness, the aperture, the contrast and even the white balance of NEF images to a degree far greater than TIFF images with image manipulation software. As a beginner, I also liked the amount of information that was stored with the image files (the EXIF data). A year down the line, I can now open a photo and check which lens I’d used, which camera settings I had and so on.
One of the main criticisms I had heard about digital photography was that the resolution offered by the cameras was not nearly high enough compared to that of traditional 35mm film cameras. Although CCD chips currently on the market are still f ar from achieving slide film resolution, they are sharp enough for most uses. I printed some of my photos on a Canon A3 photo printer and the 3000 x 2000 pixel images certainly looked sharp enough to me. I will simply try to sum-up what I enjoyed and what I missed with digital.
The greatest advantage in my view was the camera’s LCD screen. Being able to check my images while still underwater enabled me to take corrective action immediately and fly back to Britain with better results. Raw format files offered great versatility for image editing once I got back home. The cost was the next advantage. I took about 1,200 pictures in Wakatobi; the saving on film and processing was rather substantial.
I may have found it easier to learn underwater photography using TTL, instead of having to juggle with various strobe and camera settings. TTL is a slight modification of Through The Lens metering where the digital camera and the strobe communicate via a series of pre-flashes, microseconds before the shot is taken. Alex Mustard has described the technique in an excellent article published in Underwater Photography Magazine. He also mentions the use of coloured filters for available light photography. Alex, I’ll be picking your brains soon! Hooked? You bet!
